Skip to main content
Adding Products to Category: Step-by-Step Guide.
- Log in to the Management Center (MC) with your Brand Manager credentials.
- Navigate to the Category page under Menu in the MC.
- Select the category you want to add products to.
- Select ‘Contains products’ tab.
- All products are shown on the left sidebar.
- Products can be added to the category.
- Products can be filtered by: In category or Not in category
- Products can be searched for by product name or internal name.
- The ‘Add button’ will appear on the card on hover.
- The cards are draggable. You can only drag and drop from left sidebar to designated area.
- Card added from left sidebar will disappear from the list.
- Added products go to the last place in the list if added via the add button.
- Adding products by dragging can be dragged into the desired position. Moving all other products down.
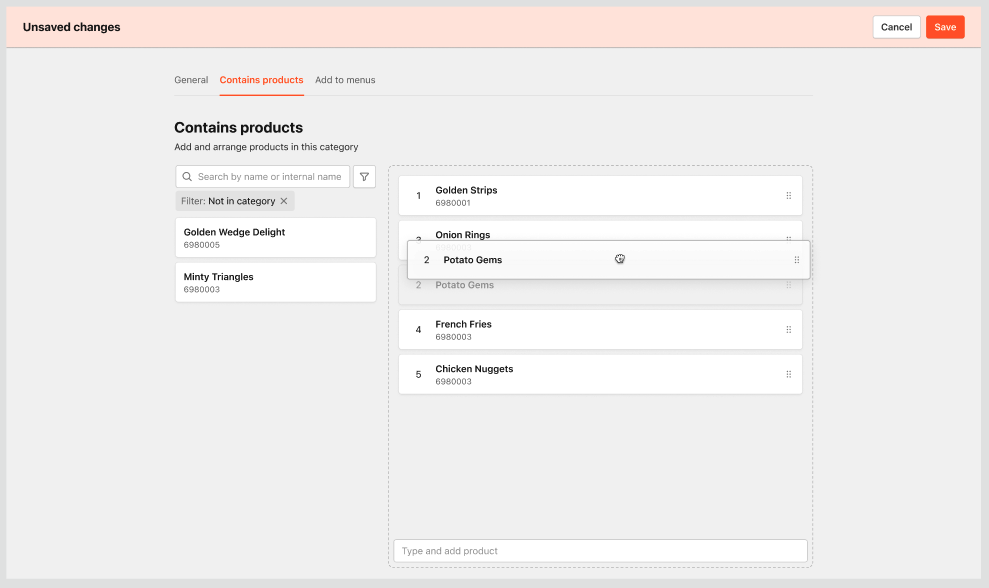
- Added products can be rearranged by drag and dropping or by entering the number in input field.
- Note : that the way you arrange (order) products in the Management Center will be the same in your apps.
- Products can also be added by directly typing the product name within the builder area.
- Hovering over the card reveals a remove button and a three-dot menu with an edit option. You can also enter edit mode by clicking the product name.
- Once you’ve selected the products, click on the ‘Save’ button to add the products to the category.

Comments
0 comments
Please sign in to leave a comment.